2016年12月15日 星期四

emgucv_Canny邊緣偵測介紹

首先我們準備好程式工作環境


這裡給自己準備一張  用  小畫家畫的一張圖

寬、高 設置 200*200


上下按看看可以查詢到 可放一個路徑字串資訊載圖


設置 寬高各為200


右鍵點開做資訊查看符合 剛才的 小畫家 獲得之資訊


Stage1. 一張原影像載入


Canny邊緣偵測 實驗

寫法1.  獲取 255的白色邊緣資訊(其餘黑為0)


查個字典


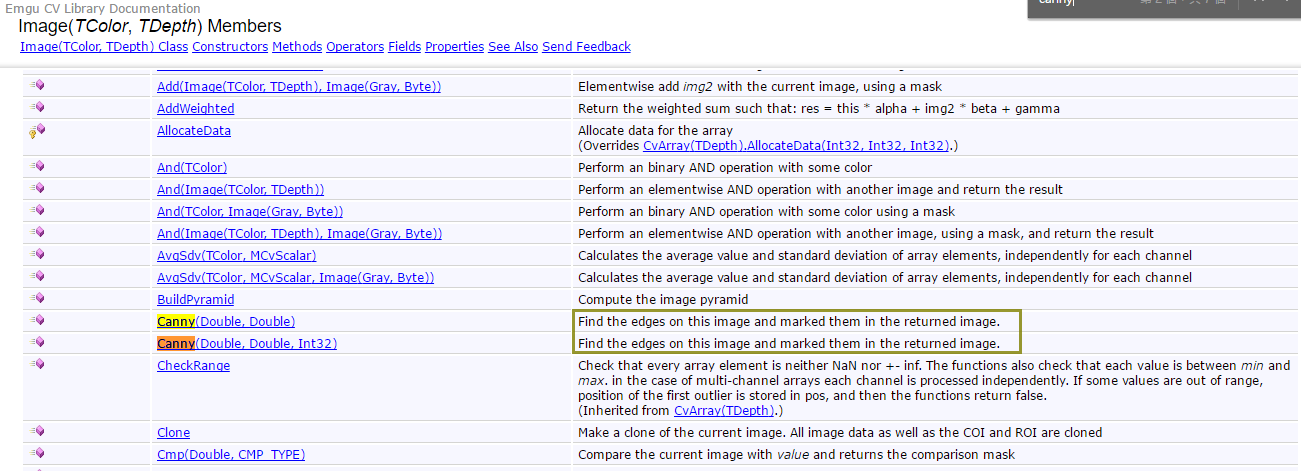
Find the edges on this image and marked them in the returned image.


參數說明  link

http://www.emgu.com/wiki/files/2.4.10/document/html/9547d8d7-dd5d-ef91-4cee-7d0544a1fe58.htm


一個邊緣(Edge)的定義

可以想像成是一個急速下滑的山谷

如果我們針對一張影像中間為較深黑色(接近0)區塊
旁邊兩側為地勢較高的(較白接近255的)區域
我們從左側至右側就會形成類似山谷的曲線~~~


或是一個水溝(中間凹下去一般)


寫法1.  Image<Gray, byte> Canny(double thresh, double threshLinking);


這裡用的參數是來自官方範例給定的

第一個參數  thresh
大(高)門檻值用來控制強邊緣的初始分割
The threshhold to find initial segments of strong edges

如果一個像素的梯度大於上限值,則被認為是邊緣像素

如果小於下限閾值,則被拋棄

如果該點的梯度在兩者之間則當這個點與高於上限值的像素點連接時我們才保留
否則刪除。


第二個參數  threshLinking
小(低)門檻值(thresh)用來控制邊緣連接
The threshold used for edge Linking


通常高低閾值比在2:1 到3:1之間


這裡我用的此張範例不是很好清楚得知參數條動差異


因此改用自己照片


關於 Canny 邊緣偵測器的解釋

Canny Edge Detection


寫法2. 關鍵函數


CvInvoke.cvCanny  設計等於下方架構

public static void cvCanny(
IntPtr  image,
IntPtr  edges,
double  threshold1,
double  threshold2,
int  apertureSize
)
第一個參數image,Input image
表示輸入圖像,必須為單通道灰度圖
第二個參數edges,Image to store the edges found by the function
表示輸出的邊緣圖像,為單通道黑白圖
第三個參數threshold1,The first threshold
第四個參數threshold2,The second threshold.
第三個參數和第四個參數表示閾值,這二個閾值中當中的小閾值用來控制邊緣連接,大的閾值用來控制強邊緣的初始分割,即如果一個像素的梯度大於上限值,則被認為是邊緣像素,如果小於下限閾值,則被拋棄。如果該點的梯度在兩者之間則當這個點與高於上限值的像素點連接時我們才保留,否則刪除。
第五個參數aperture,Aperture parameter for Sobel operator
表示Sobel算子大小,默認為3即表示一個3*3的矩陣。


Code練習

using System;
using System.Collections.Generic;
using System.ComponentModel;
using System.Data;
using System.Drawing;
using System.Linq;
using System.Text;
using System.Threading.Tasks;
using System.Windows.Forms;
using Emgu.CV;
using Emgu.CV.Structure;
using Emgu.Util;


namespace emgucv_canny_basic
{
    public partial class Form1 : Form
    {
        #region variable
        //Image<Bgr, byte> img = new Image<Bgr, byte>(200, 200);
        string imgPath = @"C:\img_res\Myphoto.jpg";
        Image<Bgr, byte> img;
        #endregion
        public Form1()
        {
            InitializeComponent();
            img = new Image<Bgr, byte>(imgPath);
        }
        private void Form1_Load(object sender, EventArgs e)
        {
            //寫法1.       
            //imageBox1.Image = img.Canny(400, 250);
            //寫法2.
            imageBox1.Image = img;
            Image<Gray, byte> grayImg = img.Convert<Gray, byte>(); //灰階
            imageBox2.Image = grayImg;
            Image<Gray, byte> binaryImg = grayImg.ThresholdToZero(new Gray(200));
            imageBox3.Image = binaryImg;
            Image<Gray, byte> edgeResult = new Image<Gray, byte>(img.Size);
            CvInvoke.cvCanny(binaryImg, edgeResult ,300,100,3);
            imageBox4.Image = edgeResult;
        }
    }
}


2016年12月3日 星期六

人臉貼圖動態呈現實作

這是來自班上


之前兩組所遇到的問題


如何做一個貼圖人臉功能


首先是先達到即時偵測人臉


之後針對左上角座標設定貼圖位置

用其 X  及 Y

Rectangle 結構

https://msdn.microsoft.com/zh-tw/library/system.drawing.rectangle(v=vs.110).aspx


using System;
using System.Collections.Generic;
using System.ComponentModel;
using System.Data;
using System.Drawing;
using System.Linq;
using System.Text;
using System.Threading.Tasks;
using System.Windows.Forms;
using Emgu.CV;
using Emgu.CV.Structure;
using Emgu.Util;
using Emgu.CV.CvEnum;

namespace 人臉上面貼圖效果
{
    public partial class Form1 : Form
    {        
        CascadeClassifier face = new CascadeClassifier("haarcascade_frontalface_default.xml");
        Image<Bgr, byte> frame; // 靜態圖用的原彩色影像結構體
        Image<Gray, byte> grayImg; // 靜態圖用的灰階影像結構體(for 暫存)
        List<Rectangle> faces = new List<Rectangle>();//存放影像中出現多個人臉的List


        Capture cap;//攝影機
        Image<Bgr, byte> img;//載入的影格(不斷更新、不只一張)
        Image<Gray, byte> grayframe;
        Image<Bgr, byte> texture;
        Image<Gray, byte> grayTexture;
        bool openWebcam = false;
        bool detectFace = false;
        bool pasteTexture = false;


        public Form1()
        {
            InitializeComponent();
        }

        private void btnLoadImg_Click(object sender, EventArgs e)
        {
            string strFileName = string.Empty;

            OpenFileDialog ofd = new OpenFileDialog();
            if (ofd.ShowDialog() == DialogResult.OK)
            {
                frame = new Image<Bgr, byte>(ofd.FileName);
                imageBox2.Image = frame;
            }
        }

        private void btnFaceDetect_OnImage_Click(object sender, EventArgs e)
        {
            grayImg = frame.Convert<Gray, byte>();
            //Face Detect 
            Rectangle[] faceDetected = face.DetectMultiScale(grayImg,
                                                                1.1,
                                                                10,
                                                                new Size(30, 30),
                                                                Size.Empty);
            faces.AddRange(faceDetected);

            foreach(Rectangle f in faces)
            {
                frame.Draw(f , new Bgr(Color.Blue) , 2);
            }
            imageBox2.Image = frame;
        }

        private void btnPasteImg_onImage_Click(object sender, EventArgs e)
        {
            string strFileName = string.Empty;
            OpenFileDialog ofd = new OpenFileDialog();
            Image<Bgr, byte> texture;
            if (ofd.ShowDialog() == DialogResult.OK)
            {
                texture = new Image<Bgr, byte>(ofd.FileName);//取得貼圖
                foreach (Rectangle f in faces)
                {
                    //img.Draw(f, new Bgr(Color.Red), 2);

                    frame.ROI = new Rectangle(f.X, f.Y, texture.Width, texture.Height);
                    texture.CopyTo(frame);
                    frame.ROI = new Rectangle();
                    imageBox2.Image = frame;
                }
            }
        }


        private void btnOpenWebcam_Click(object sender, EventArgs e)
        {
            cap = new Capture(0);           
            Application.Idle += updateFrame;
            openWebcam = true;
            
            //imageBox1.Image = img;
        }

        private void updateFrame(object sender, EventArgs e)
        {
            if(openWebcam)
            {
                img = cap.QueryFrame();
                imageBox1.Image = img; //顯示
            }
            
            //imageBox1.Image = img; //顯示

            if(detectFace)
            {
                List<Rectangle> faces = new List<Rectangle>();                

                img = cap.QueryFrame();

                grayframe = img.Convert<Gray, byte>();

                Rectangle[] faceDetected = face.DetectMultiScale(grayframe,
                                                                     1.1,
                                                                     10,
                                                                     new Size(30, 30),
                                                                     Size.Empty);

                faces.AddRange(faceDetected);

                foreach (Rectangle f in faces)
                {
                    img.Draw(f, new Bgr(Color.Red), 2);
                }
                imageBox1.Image = img;
            }


            if(pasteTexture)
            {
                List<Rectangle> faces = new List<Rectangle>();

                img = cap.QueryFrame();

                grayframe = img.Convert<Gray, byte>();

                Rectangle[] faceDetected = face.DetectMultiScale(grayframe,
                                                                     1.1,
                                                                     10,
                                                                     new Size(30, 30),
                                                                     Size.Empty);
                faces.AddRange(faceDetected);

                foreach (Rectangle f in faces)
                {
                    //img.Draw(f, new Bgr(Color.Red), 2);
                    img.ROI = new Rectangle(f.X  , f.Y - 60, texture.Width, texture.Height);// 帽子要帶高一些
                    //method.1
                    //texture.CopyTo(img);


                    //method.2
                    grayTexture = texture.Convert<Gray,byte>();
                    //CvInvoke.cvNamedWindow("灰圖");
                    //CvInvoke.cvShowImage("灰圖", grayTexture);

                    CvInvoke.cvThreshold(grayTexture, grayTexture, 125, 255, THRESH.CV_THRESH_BINARY);
                    //CvInvoke.cvShowImage("二值圖", grayTexture);


                    CvInvoke.cvCopy(texture, img, grayTexture);

                    img.ROI = new Rectangle();
                }
                imageBox1.Image = img;
            }
        }

        private void btnFaceDetect_OnWebcam_Click(object sender, EventArgs e)
        {
            detectFace = true;
            pasteTexture = false;
        }

        private void btnPasteImg_onWebcam_Click(object sender, EventArgs e)
        {
            string strFileName = string.Empty;
            OpenFileDialog ofd = new OpenFileDialog();            
            if (ofd.ShowDialog() == DialogResult.OK)
            {
                texture = new Image<Bgr, byte>(ofd.FileName);//取得貼圖
            }

            detectFace = false;
            pasteTexture = true;
        }
    }
}


2016年12月2日 星期五

背景相減_手部提取示範


這次目標做出一個背景相減


原理:

Step1. 先建立一個背景模型


Step2. 在針對後續出現的每一張一直不斷更新的影像去跟背景模型做相減

一個一個像素數值會具有亮度的差異


最後得到我們想要的移動前景


using System;
using System.Collections.Generic;
using System.ComponentModel;
using System.Data;
using System.Drawing;
using System.Linq;
using System.Text;
using System.Threading.Tasks;
using System.Windows.Forms;
using Emgu.CV;
using Emgu.Util;
using Emgu.CV.CvEnum;
using Emgu.CV.Structure;
using Emgu.CV.UI;


namespace 背景相減提取手部
{
    public partial class Form1 : Form
    {
        #region Globle Var
        Capture _capture = null; // 攝影機
        Image<Gray, Byte> difI; //相減後顯示灰階亮度差異
        Image<Gray, byte> grayFrame; //在做背景模型前先準備灰階暫存用的影像存放結構體
        Image<Bgr, Byte> frame; //原彩影               
        Image<Gray, Byte> refI; //參考影像
        Image<Gray, Byte> grayBg; //接受參考影像用來做顯示背景模型用

        //切換流程用的Flag
        bool _newRef = false;
        bool cap = false;
        bool frameDiff = false;
        bool frameBinary = false;
        #endregion


        public Form1()
        {
            InitializeComponent();
            Application.Idle += updateFrame;
        }

        private void updateFrame(object sender, EventArgs e)
        {
            if (cap)
            {
                frame = _capture.QueryFrame();//這裡不斷接收新的下一frame
                imageBox1.Image = frame.Flip(Emgu.CV.CvEnum.FLIP.HORIZONTAL);//水平翻轉

                if (frameDiff)
                {
                    grayFrame = frame.Convert<Gray, Byte>();//轉灰階
                    grayFrame = grayFrame.Flip(Emgu.CV.CvEnum.FLIP.HORIZONTAL);//水平翻轉

                    if (_newRef!=true)
                    {
                        refI = grayFrame;
                        _newRef = true;
                        grayBg = new Image<Gray, Byte>(refI.Width, refI.Height);
                    }

                    difI = grayFrame.AbsDiff(refI);
                    imageBox2.Image = difI;

                    if (frameBinary)
                    {
                        difI = difI.ThresholdBinary(new Gray(60), new Gray(255));
                        imageBox3.Image = difI;
                    }
                }
            }
        }

        private void openWebcam_Click(object sender, EventArgs e)
        {
            cap = true;
            _capture = new Capture();
        }

        private void btnBG_Click(object sender, EventArgs e)
        {
            frameDiff = true;             
        }

        private void btnBinary_Click(object sender, EventArgs e)
        {
            frameBinary = true;
        }
    }
}


動態的
就好比一直有手這個前景出現在視訊畫面中
跟後面背景有明顯差異


2016年11月29日 星期二

觀察以前學長他們做的成果原理然後學習_目標做出點擊事件_使用者角度思考_part3

在做點擊之前


我們看一個之前學長他們做的很厲害的範例


你會發現當時學長他們做這塊滑鼠移動的時候

也是跟範例有點像
做了一個偵測範圍~~~~

操控滑鼠的 原理有點相似 !!!


我們在之前做的都是侷限在視訊畫面上的


它們這組就是用在不同媒介上的


OK  這裡就是針對這部分去做一個分享
過去在許多研究上也曾出現過很多

空氣XXX

遠控的研究   主要都是針對非接觸 、  降低病菌接觸 、 腸病毒啦之類議題


所以除了   遊戲應用

我們也可以針對  醫療方面去做 一些巧思~~~


這裡我先針對同學要做 點擊事件  來簡單示範


密技 : 針對該行 --> 的下一行下break point

或者   該行跟下一行都下break point  然後  F10 ---> 滑鼠游標移動過去


這個就是我們目前螢幕的解析度( 1366 * 768 )

對螢幕  --> 右鍵 --> 顯示設定


程式執行畫面的解析度


imageArea


mouseStableArea  就是那個固定在視訊畫面中央的藍色方框

粗度是 3


從字面上意思  跟  跑程式後的觀察


你也可以得知道  當它移動到此範圍不會做任何移動觸發(trigger)


maxMouseSpeed  的 數值 定義


如果太慢就可以針對這裡去更改移動速度

選取  --> 右鍵  -->  Add Watch


這裡由於我們現在是對於人臉追蹤這個範例去進行操控滑鼠


所以我們需要思考要在捨麼時候  才去進行 觸發滑鼠左鍵 按下的判斷


我這裡是想要滑鼠移動到我視訊畫面再來要畫出一個紫色方框區塊在觸發
按鈕狀態更改


學習站在使用者角度思考

這裡我們回過頭來想


如果這是給一個四肢不便的使用者用

那他怎麼操作會比較方便呢????


目前滑鼠是移動到特定藍色方框就停止呀


所以我把紫色方框畫在那裏不方便


因為他停止就是指他想針對該地方做點選


所以我們更改一下

Step1.
滑鼠先移動到我們想要點擊的區塊

Step2.
再去做 點擊


這裡可以判斷位置

先做一個對 Label 去進行 顏色跟文字內容更改的操控

之後你就類似判斷當Label文字是捨麼的時候....

你就可以去做......


不過範圍要自己設置看哪個比較合適


這是針對 滑鼠操控的一系列簡易介紹


學習如何從emgucv的官方範例去學習滑鼠追蹤控制的程式_part2_學習去分析範例程式寫註解_查字典_問題排除

同學你可以嘗試把程式碼再寫一次

這是官方提供的學習用範例
因為剛剛已經做過執行  而且可成功!!!

很長一大串

如果是我   我會先把這串程式縮短

一個一個加進去   看效果跟執行的狀況不同與演進

原本好大一串程式碼

using System;
using System.Collections.Generic;
using System.ComponentModel;
using System.Data;
using System.Drawing;
using System.Linq;
using System.Text;
using System.Threading.Tasks;
using System.Windows.Forms;
using Emgu.CV;
using Emgu.CV.Structure;
using Emgu.Util;
using System.Runtime.InteropServices;

namespace faceMouseControl_example
{
    public partial class Form1 : Form
    {
        private Capture _capture;
        private HaarCascade _face;
        public Form1()
        {
            InitializeComponent();

            //Read the HaarCascade object
            _face = new HaarCascade("haarcascade_frontalface_default.xml");

            if (_capture == null)
            {
                try
                {
                    _capture = new Capture();
                }
                catch (NullReferenceException excpt)
                {
                    MessageBox.Show(excpt.Message);
                    return;
                }
            }

            Application.Idle += updateFrame;
        }

        private void updateFrame(object sender, EventArgs e)
        {
            Image<Bgr, Byte> frame = _capture.QueryFrame();
            Image<Gray, Byte> grayImage = frame.Convert<Gray, Byte>();
            grayImage._EqualizeHist();

            Rectangle imageArea = grayImage.ROI;

            Rectangle mouseStableArea =
               new Rectangle((int)(imageArea.Width * 0.4), (int)(imageArea.Height * 0.4), 
                             (int)(imageArea.Width * 0.2), (int)(imageArea.Height * 0.2));

            //draw the stable area where the face will not trigger a movement;
            frame.Draw(mouseStableArea, new Bgr(255, 0, 0), 1);

            MCvAvgComp[] faces = grayImage.DetectHaarCascade(_face)[0];
            if (faces.Length > 0)
            {   //if there is at least one face

                #region find the biggest face
                MCvAvgComp biggestFace = faces[0];
                for (int i = 1; i < faces.Length; i++)
                {
                    if (faces[i].rect.Width * faces[i].rect.Height > biggestFace.rect.Width * biggestFace.rect.Height)
                        biggestFace = faces[i];
                }
                #endregion

                //draw a yellow rectangle around the face
                frame.Draw(biggestFace.rect, new Bgr(255, 255, 0.0), 1);

                Point biggestFaceCenter = new Point(biggestFace.rect.X + biggestFace.rect.Width / 2, biggestFace.rect.Y + biggestFace.rect.Height / 2);
                Point imageAreaCenter = new Point(imageArea.X + imageArea.Width / 2, imageArea.Y + imageArea.Height / 2);
                //draw a green cross at the center of the biggest face
                frame.Draw(
                    new Cross2DF(biggestFaceCenter, biggestFace.rect.Width * 0.1f, biggestFace.rect.Height * 0.1f),
                    new Bgr(0, 255, 0), 1);

                if (!mouseStableArea.Contains(biggestFaceCenter))
                {   //the point is far enough from the center to triger a movement

                    //horizontal fraction is a value in [-0.5, 0.5] where
                    //-0.5 refer to the far left and 
                    //0.5 refer to the far right
                    double horizontalFraction = (double)(biggestFaceCenter.X - imageAreaCenter.X) / imageArea.Width;
                    //do the same for vertical fraction
                    double verticalFraction = (double)(biggestFaceCenter.Y - imageAreaCenter.Y) / imageArea.Height;

                    Rectangle rect = System.Windows.Forms.Screen.PrimaryScreen.Bounds;
                    int maxMouseSpeed = rect.Width / 20;
                    System.Drawing.Point p;
                    GetCursorPos(out p);
                    p.X = Math.Min(Math.Max(0, p.X + (int)((maxMouseSpeed / 2) * horizontalFraction)), rect.Width);
                    p.Y = Math.Min(Math.Max(0, p.Y + (int)((maxMouseSpeed / 2) * verticalFraction)), rect.Height);
                    SetCursorPos(p.X, p.Y);
                }
            }
            imageBox1.Image = frame;
        }
        [DllImport("user32.dll")]
        private static extern bool GetCursorPos(out System.Drawing.Point lpPoint);

        [DllImport("user32.dll")]
        private static extern bool SetCursorPos(int X, int Y);
    }
}


首先我們把程式刪減到

打開視訊畫面的階段(這是基本的)


官方的開視訊顯示的Code

using System;
using System.Collections.Generic;
using System.ComponentModel;
using System.Data;
using System.Drawing;
using System.Linq;
using System.Text;
using System.Threading.Tasks;
using System.Windows.Forms;
using Emgu.CV;
using Emgu.CV.Structure;
using Emgu.Util;
using System.Runtime.InteropServices;

namespace faceMouseControl_example
{
    public partial class Form1 : Form
    {
        private Capture _capture;        
        public Form1()
        {
            InitializeComponent();            
            if (_capture == null)
            {
                try
                {
                    _capture = new Capture();
                }
                catch (NullReferenceException excpt)
                {
                    MessageBox.Show(excpt.Message);
                    return;
                }
            }
            Application.Idle += updateFrame;
        }

        private void updateFrame(object sender, EventArgs e)
        {
            Image<Bgr, Byte> frame = _capture.QueryFrame();
            imageBox1.Image = frame;
        }
    }
}


我習慣的寫法(喜歡寫短一些....簡潔俐落一點 、功能先達到、但比較不嚴謹也較暴力)

using System;
using System.Collections.Generic;
using System.ComponentModel;
using System.Data;
using System.Drawing;
using System.Linq;
using System.Text;
using System.Threading.Tasks;
using System.Windows.Forms;
using Emgu.CV;
using Emgu.CV.Structure;
using Emgu.Util;
using System.Runtime.InteropServices;

namespace faceMouseControl_example
{
    public partial class Form1 : Form
    {
        Capture _capture = null;
        Image<Bgr, byte> frame;
        public Form1()
        {
            InitializeComponent();
            _capture = new Capture(0);
            Application.Idle += updateFrame;
        }                                       

        private void updateFrame(object sender, EventArgs e)
        {
            frame = _capture.QueryFrame();
            imageBox1.Image = frame;
        }
    }
}


官方的轉灰階
宣告寫在update中 一直新空間產生

using System;
using System.Collections.Generic;
using System.ComponentModel;
using System.Data;
using System.Drawing;
using System.Linq;
using System.Text;
using System.Threading.Tasks;
using System.Windows.Forms;
using Emgu.CV;
using Emgu.CV.Structure;
using Emgu.Util;
using System.Runtime.InteropServices;

namespace faceMouseControl_example
{
    public partial class Form1 : Form
    {
        private Capture _capture;

        public Form1()
        {
            InitializeComponent();
            if (_capture == null)
            {
                try
                {
                    _capture = new Capture();
                }
                catch (NullReferenceException excpt)
                {
                    MessageBox.Show(excpt.Message);
                    return;
                }
            }
            Application.Idle += updateFrame;
        }                                       

        private void updateFrame(object sender, EventArgs e)
        {
            Image<Bgr, Byte> frame = _capture.QueryFrame();
            Image<Gray, Byte> grayImage = frame.Convert<Gray, Byte>();
            imageBox1.Image = grayImage;
        }
    }
}


轉灰階我的普通寫法

using System;
using System.Collections.Generic;
using System.ComponentModel;
using System.Data;
using System.Drawing;
using System.Linq;
using System.Text;
using System.Threading.Tasks;
using System.Windows.Forms;
using Emgu.CV;
using Emgu.CV.Structure;
using Emgu.Util;
using System.Runtime.InteropServices;

namespace faceMouseControl_example
{
    public partial class Form1 : Form
    {
        Capture _capture = null;
        Image<Bgr, byte> frame;
        Image<Gray, Byte> grayImage;

        public Form1()
        {
            InitializeComponent();
            _capture = new Capture(0);
            Application.Idle += updateFrame;
        }                                       

        private void updateFrame(object sender, EventArgs e)
        {
            frame = _capture.QueryFrame();
            grayImage = frame.Convert<Gray, Byte>();
            imageBox1.Image = grayImage;
        }
    }
}


寫裡面跟寫外面差別在哪?????


寫外面


寫裡面


感覺沒差多少


官方範例寫法記憶體測試
Visual Studio  --> Performance Profiler --> Memory Usage


在update中 宣告多次


在外圍宣告一次


無聊順便測試的

一些參考

請問迴圈中使用之變數宜宣告於何處?
https://social.msdn.microsoft.com/Forums/zh-TW/9abf11cc-af5f-45ab-a410-a812bc498bf0?forum=233

Creating objects in Loop C#
http://stackoverflow.com/questions/2321388/creating-objects-in-loop-c-sharp


感覺偏題了  好 繼續

後續我先用一種簡單寫法
就好


(1).學會查字典


到底這個  _EqualizeHist() 做了捨麼神奇的事情 ????
(這句可省--->有無做都可以偵測到喔)


滑鼠一上去查看一下


右鍵 --> Go to Definition --> 上移


接著去查字典了優
http://www.emgu.com/wiki/files/2.4.10/document/

點選左側  Emgu.CV 的 namespace

Ctrl + F  -->  Image


Ctrl + F  -->  member --> 點進去


The algorithm inplace normalizes brightness and increases contrast of the image.
For color images, a HSV representation of the image is first obtained and the V (value) channel is histogram normalized


講白話一點 這個主要是作色階分布平等化(均勻化)

用來改善影像對比喔!!!

由於我們是用 emgucv 提供的  UI 套件 中 imageBox 所以可以右鍵 --> 直方圖看差異


色階平等化前
 色階平等化後


有關於色階分布圖的補充
https://helpx.adobe.com/tw/photoshop/using/viewing-histograms-pixel-values.html


(2).學會下中斷點查看細部數值資訊


(3).學會問題排除_看錯誤資訊


(4).學會邊寫邊問自己問題(註解+改寫程式)


喔  因為它是針對  原Color視訊畫的


所以你會發現


我和Lena 的臉 偵測框不會同時出現


針對畫在中央十字架上的分析


最後是  滑鼠座標部分


一個用來獲取滑鼠位置

一個是設置位置(更新位置)


針對在該範圍區塊進行寬、高的移動量設置